Nessus
Nessus uses techniques similar to Nmap to find and report vulnerabilities. The results are presented in a GUI. It does not make assumptions when scanning, like assuming the web application is running on port 80 for instance.
Installation on Debian/Kali and Ubuntu
Goto Tenable: Nessus Essentials and register an account to get an activation code.
Download the
Nessus-#.###.#-debian6_amd64.debfile and install:
sudo dpkg -i <the package_file.deb filename>
Start the Nessus Service:
sudo /etc/init.d/nessusd start
Open up Firefox and goto https://localhost:8834/. You may be prompted with a security risk alert. Click Advanced… -> Accept the Risk and Continue.
Select the option
Nessus Essentials.Click the Skip button and enter the activation code from the email from Nessus.
Fill out the
UsernameandPasswordfields.Nessus will now install the plugins required for it to function. Takes a long time. Get some tea.
Log in with the account credentials made earlier.
You can have 16 different (IP) targets with this license.
Configuration
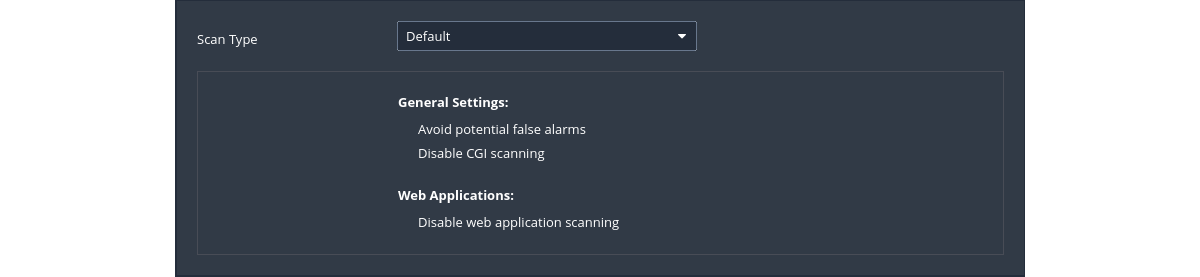
Scans can be configured based on different scan and policy templates. These templates will determine the settings that will be found within the scan policy settings. These are the general settings that can be accessed:
Basic: Specify security-related and organizational aspects of a scan or policy. These aspects will include the name of the scan, the targets of the scan, whether it is scheduled and who has access to it.
Discovery is where the ports to be scanned and the methods to be used in the discovery are set.
Assessment is where and how the type of vulnerability scan to do is set. Nessus will check susceptibility of Web applications to attacks and other systems to brute-force attacks as well. This setting has sections allowing customisation of general scans to Windows, SCADA, Web applications, and even brute-force checks.
Report sets how scan reports are generated and the information that should be included within them.
Advanced sets scan efficiency and the operations of the scan, and allows for enabling scan debugging.
Troubleshooting
Forgotten password
Navigate to:
cd /opt/nessus/sbinList users:
./nessuscli lsuserReset the password for user
username:./nessuscli chpasswd username
API access is disabled
Nessus displays warning “Nessus has detected that API access on this scanner is disabled” during usage. To fix this issue, stop the Nessus service, reset the configuration, restart Nessus and register again using the activation code.
Stop the Nessus service:
service nessusd stopReset the configuration:
/opt/nessus/sbin/nessuscli fix --resetStart the Nessus service:
/etc/init.d/nessusd startRegister Nessus using the activation code:
/opt/nessus/sbin/nessuscli fetch --register xxxx-xxxx-xxxx-xxxx-xxxxLogin to Nessus to update plugins.
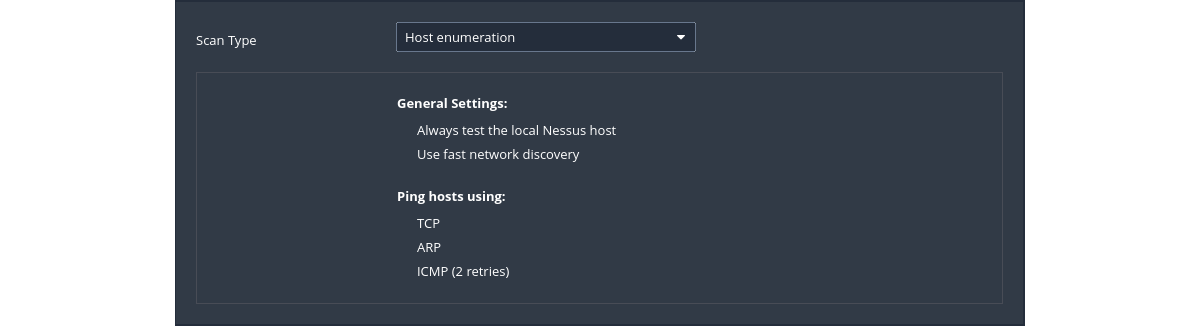
Host discovery
 |
|---|
| Performs a simple scan to discover live hosts and open ports. |
Default config
 |
|---|
| Scan And Policy Templates: Discovery |
Scan
Discovery Scan Settings is where the ports to be scanned and the methods to be used in the discovery are set.
Launch scan
Confirm found vulnerabilities by running other vulnerability scanners against the targets to eliminate the possibility of any false positives.
Basic network scan
 |
|---|
| Performs a full system scan that is suitable for any host. For example, this template can be used for an internal vulnerability scan on an organisation's systems. |
Default config
 |
|---|
| Scan And Policy Templates: Vulnerabilities |
Example scan
Under
DISCOVERY(on the left) set theScan Typeto cover ports1-65535In
ADVANCEDchangeScan TypetoScan low bandwidth linksLaunch scan
Confirm found vulnerabilities by running other vulnerability scanners against the targets to eliminate the possibility of any false positives.
Web application scan
 |
|---|
| Scan for published and unknown web vulnerabilities. |
Default config
 |
|---|
| Scan And Policy Templates: Vulnerabilities |
Settings
Assessment is where and how the type of vulnerability scan to do is set. Nessus will check susceptibility of Web applications to attacks and other systems to brute-force attacks as well. This setting has sections allowing customisation of general scans to Windows, SCADA, Web applications, and even brute-force checks.
Example scan
Select target
Select plugins
CGI abuses - This plugin family checks for anything that is ‘CGI’ related, unless it is XSS (and only a XSS vulnerability), in which case it falls into the “CGI abuses : XSS” family. These checks use a combination of detection techniques, including checking version of the application and testing for the actual vulnerability. The attacks include software detection, information disclosure, XSS, SQLi, LFI, RFI, overflows and more.
CGI abuses : XSS - Specific CGI checks for reflective and persistent XSS vulnerabilities in common web applications.
Web servers - Plugins in this family detect approximately 1531 specific vulnerabilities in popular web servers, such as Apache, IIS and generic vulnerabilities associated with the HTTP protocol itself.
Launch scan
Confirm found vulnerabilities by running other vulnerability scanners against the targets to eliminate the possibility of any false positives.