OpenVAS
OpenVAS is an application used to scan endpoints and web applications to identify and detect vulnerabilities. It is commonly used as part of mitigation solutions to quickly identify any gaps in production or even development servers or applications.
Scanning infrastructure
Create task
To create a configurable task navigate to the star icon in the upper right-hand corner of the Tasks dashboard and select New Task:
 |
|---|
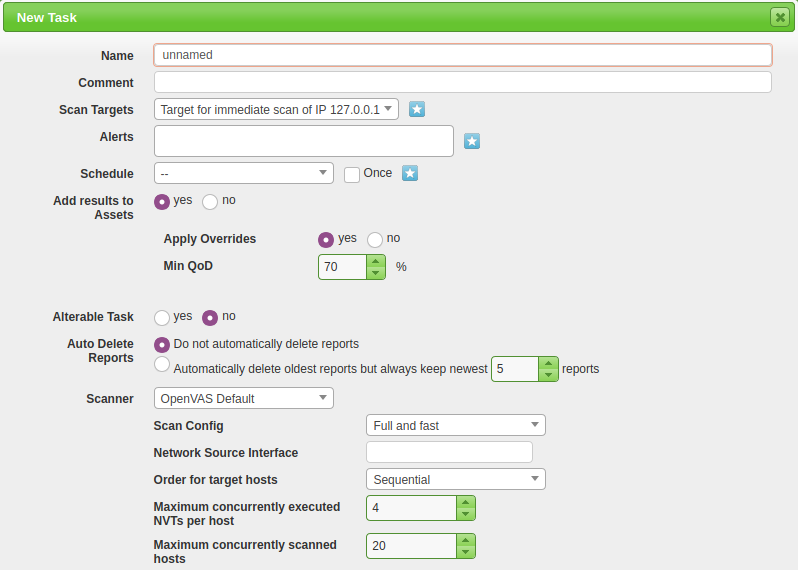
| When selecting New Task from the dropdown a large pop-up with many options appears. |
Name: Setting the name the scan will be known as inside of OpenVAS
Scan Targets: The targets to scan, can include Hosts, Ports, and Credentials.
Scanner: The scanner to use. Default is the OpenVAS architecture.
Scan Config: OpenVAS has seven different scan types.
Scoping a new target
To scope a new target, navigate to the star icon next to Scan Targets.
 |
|---|
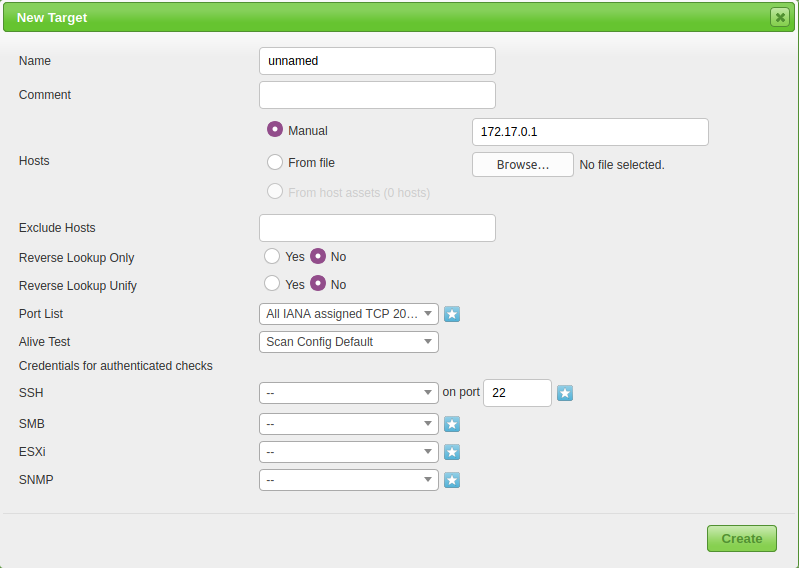
| The two main options to configure are the Name and the Hosts. |
Continue creating the task and begin the scan.
Launch
After the task is created you will be brought back to the scan dashboard where you can monitor and start the task. To start the task navigate to the start icon under Actions.
Reporting and continuous monitoring
The report
The automated report from OpenVAS begins with some basic host and task information including Host, Start, End, and Vulnerability categories. It will also check for host authentications and an overall summary of open ports on the host.
Continuous monitoring
OpenVAS offers many options for continuous and scheduled monitoring/vulnerability management. If you work in a team or a pipeline this can allow you to efficiently and quickly optimize your current solutions. Examples of continuous vulnerability scanning utilities are Alerts, Schedules, and Agents.
Creating schedules
To begin creating a schedule navigate to Configuration -> Schedules and click on the blue star icon in the upper left-hand corner.
 |
|---|
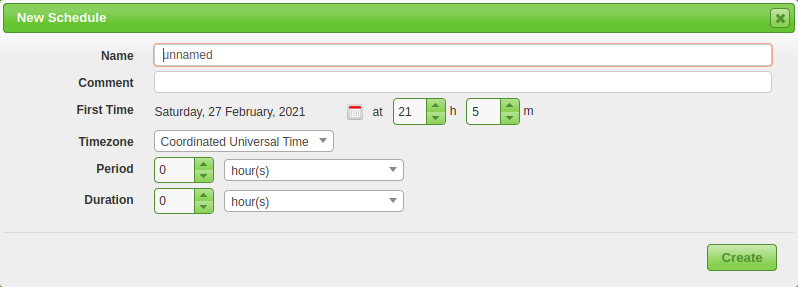
| Fill out the basic information like Name, First Start Time, Period, etc. |
Once you have the schedule created you can now create a new Task/Scan with this created schedule attached.
Crafting alerts
The process for creating alerts is similar to creating a schedule, navigate to Configuration -> Alerts and click on the blue star icon in the upper left-hand corner.
 |
|---|
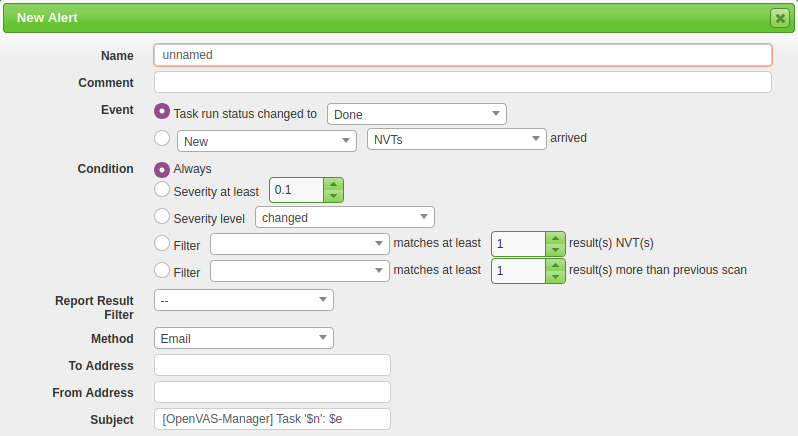
| The main options are Name, Event, Condition, and To Address. |
The event can be configured to alert based on the status of the scan or when a new NVT/vulnerability is detected. The condition option will make sure that your inbox isn’t flooded with alerts, this can be changed based on severity or filters. The To Address is fairly self-explanatory and will send an email of the alert to the specified mail address. Once created you will again need to connect the alert to a new Task/Scan.